どうも。こんばんわ
なにがあったのか
image.png
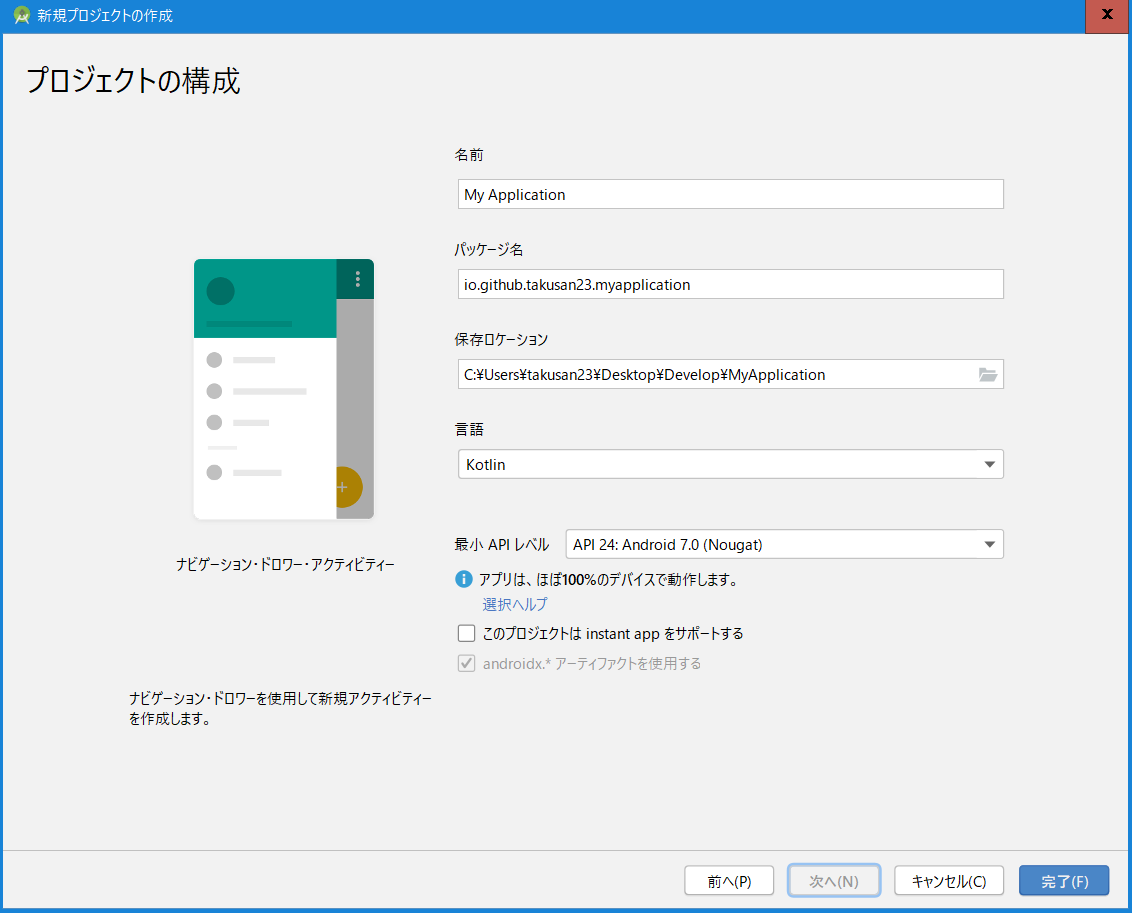
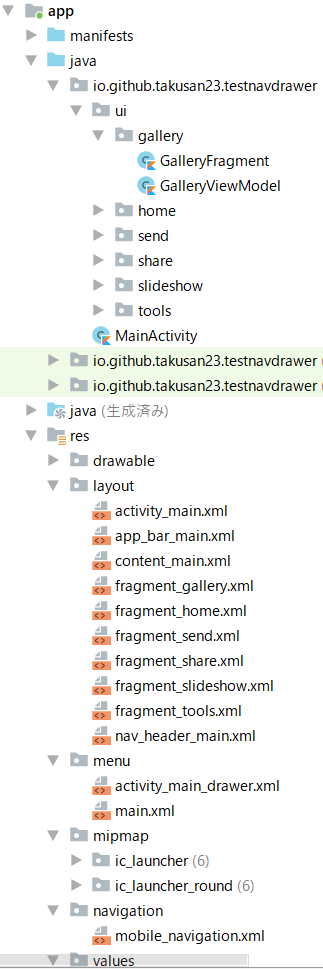
この画面からナビゲーションドロワーを作成すると前と違ってめっちゃフォルダ・ファイルが作成されるようになった。どゆこと
image.png
しかもbuild.gradleに書き足さないとエラーが出るってなんだよ。
1
| Cannot inline bytecode built with JVM target 1.8 into bytecode that is being built with JVM target 1.6. Please specify proper '-jvm-target' option
|
このエラーはappフォルダにあるほうのbuild.gradleを開いて、android{}の波かっこの中に以下の文を書き足すことで動きます。
1
2
3
4
5
6
7
| compileOptions {
sourceCompatibility = 1.8
targetCompatibility = 1.8
}
kotlinOptions {
jvmTarget = "1.8"
}
|
ということで今回は空の状態からナビゲーションドロワーを作っていこうと思います。
ViewModelなんて触ったことないので…
環境
| なまえ |
なかみ |
| Androidバージョン |
10 |
| Android Studioバージョン |
3.5 |
| 端末 |
Pixel 3 XL |
| 言語 |
Kotlin(なのでfindViewByIdを使いません。) |
本題
つくれたらappフォルダに入っているbuild.gradleを開いてマテリアルデザインのライブラリを入れます。
1
| implementation 'com.google.android.material:material:1.2.0-alpha01'
|
メニュー用意
ナビゲーションドロワーに入れるメニューですね。
resディレクトリを右クリックしてフォルダを作成してください。
名前をmenuにしてね。
image.png
作れたらmenuフォルダの中にdrawer_menuって名前で作ってね。(別にわかりやすい名前があるならそれでもいいよ。)
image.png
そしたらそのdrawer_menu.xmlを開いて適当にメニューを作成します。
が、その前にアイコンを持ってきましょう。
メニューに表示させるアイコンを用意する
image.png
ベクターアセットからお好みの画像を持ってきてください。
今回は適当にドロイド君で
image.png
メニュー項目追加
drawer_menu.xmlに書いてください。
itemを追加するときはtitle(必須)とid(識別に使う)は絶対書いてね。アイコンはいらないかもだけどあったほうがよさげ。
1
2
3
4
5
6
7
8
9
| <?xml version="1.0" encoding="utf-8"?>
<menu xmlns:app="http://schemas.android.com/apk/res-auto"
xmlns:android="http://schemas.android.com/apk/res/android">
<group android:checkableBehavior="single">
<item android:icon="@drawable/ic_android_black_24dp" android:title="Java" android:id="@+id/drawer_menu_java" />
<item android:icon="@drawable/ic_android_black_24dp" android:title="Kotlin" android:id="@+id/drawer_menu_kotlin"/>
<item android:icon="@drawable/ic_android_black_24dp" android:title="JS" android:id="@+id/drawer_menu_js"/>
</group>
</menu>
|
レイアウト作成
いよいよレイアウトですよ。レイアウト作るの楽しい。
1
2
3
4
5
6
7
8
9
10
11
12
13
14
15
16
17
18
| <?xml version="1.0" encoding="utf-8"?>
<androidx.constraintlayout.widget.ConstraintLayout xmlns:android="http://schemas.android.com/apk/res/android"
xmlns:app="http://schemas.android.com/apk/res-auto"
xmlns:tools="http://schemas.android.com/tools"
android:layout_width="match_parent"
android:layout_height="match_parent"
tools:context=".MainActivity">
<TextView
android:layout_width="wrap_content"
android:layout_height="wrap_content"
android:text="Hello World!"
app:layout_constraintBottom_toBottomOf="parent"
app:layout_constraintLeft_toLeftOf="parent"
app:layout_constraintRight_toRightOf="parent"
app:layout_constraintTop_toTopOf="parent" />
</androidx.constraintlayout.widget.ConstraintLayout>
|
何もしていなければこのままですね。こっからドロワーを追加していきます。
こう書き換えます。
1
2
3
4
5
6
7
8
9
10
11
12
13
14
15
16
17
18
19
20
21
22
23
24
25
| <?xml version="1.0" encoding="utf-8"?>
<androidx.drawerlayout.widget.DrawerLayout xmlns:android="http://schemas.android.com/apk/res/android"
xmlns:app="http://schemas.android.com/apk/res-auto"
xmlns:tools="http://schemas.android.com/tools"
android:layout_width="match_parent"
android:layout_height="match_parent"
tools:context=".MainActivity">
<TextView
android:layout_width="wrap_content"
android:layout_height="wrap_content"
android:text="Hello World!"
app:layout_constraintBottom_toBottomOf="parent"
app:layout_constraintLeft_toLeftOf="parent"
app:layout_constraintRight_toRightOf="parent"
app:layout_constraintTop_toTopOf="parent" />
<com.google.android.material.navigation.NavigationView
android:layout_width="wrap_content"
android:layout_height="match_parent"
android:id="@+id/navigation_drawer"
app:menu="@menu/drawer_menu"
android:layout_gravity="start"/>
</androidx.drawerlayout.widget.DrawerLayout>
|
できたら実行してみてください。この段階ではまだ何もMainActivity.ktに手を付けてません。
起動出来たら端から左へスワイプしてみてください。メニューが出ると思います。
Screenshot_20191107-220921.png
Android 10でジェスチャーナビゲーション使ってるんですけど開けず戻るになる方へ
左の端っこを長押しすると少しだけナビゲーションドロワーが出てくるのでそのままスワイプすればいいです。
Screenshot_20191107-220915.png
ジェスチャーナビゲーションと相性悪い。ケースとかつけてると開くの大変。
ハンバーガーメニューをつくる
この左上にある三本線のアイコンのことです。
Screenshot_20191107-225021.png
ハンバーガーメニューはナビゲーションドロワーを開く三本の横線のことです。海を渡るとハンバーガーメニューって呼ばれてるそうです。
これは少し大変なので頑張っていきましょう。
styles.xmlを書き足す
こんな感じに
1
2
3
4
5
6
7
8
9
10
11
12
13
14
15
| <resources>
<!-- ドロワー用レイアウト -->
<style name="DrawerTheme" parent="Theme.AppCompat.Light.DarkActionBar">
<item name="windowActionBar">false</item>
<item name="windowNoTitle">true</item>
<item name="colorPrimary">@color/colorPrimary</item>
<item name="colorPrimaryDark">@color/colorPrimaryDark</item>
<item name="colorAccent">@color/colorAccent</item>
</style>
</resources>
|
元からあるAppThemeは消しません。ナビゲーションドロワーを置いているActivityでのみ使うためです。
Activityを追加したときのためにAppThemeを残してあります。
Manifest書き換える
AndroidManifest.xmlを開いてね。
開けたら以下の一行を探してください。
1
| android:theme="@style/AppTheme"
|
これをさっき作ったDrawerThemeへ書き換えます。
1
| android:theme="@style/DrawerTheme"
|
ツールバーを設置
ツールバーっていうのはアプリ名が書いてある上のバーのことです。
ツールバーはstyles.xmlで消す設定にしたのでレイアウトにツールバーを置く必要があります。
ということで書き換えます。
1
2
3
4
5
6
7
8
9
10
11
12
13
14
15
16
17
18
19
20
21
22
23
24
25
26
27
28
29
30
31
| <?xml version="1.0" encoding="utf-8"?>
<androidx.drawerlayout.widget.DrawerLayout xmlns:android="http://schemas.android.com/apk/res/android"
xmlns:app="http://schemas.android.com/apk/res-auto"
xmlns:tools="http://schemas.android.com/tools"
android:id="@+id/drawer_layout"
android:layout_width="match_parent"
android:layout_height="match_parent"
tools:context=".MainActivity">
<LinearLayout
android:layout_width="match_parent"
android:layout_height="match_parent"
android:orientation="vertical">
<androidx.appcompat.widget.Toolbar
android:id="@+id/toolbar"
android:layout_width="match_parent"
android:layout_height="wrap_content"
android:background="?attr/colorPrimary"
android:minHeight="?attr/actionBarSize"
android:theme="?attr/actionBarTheme" />
</LinearLayout>
<com.google.android.material.navigation.NavigationView
android:layout_width="wrap_content"
android:layout_height="match_parent"
android:id="@+id/navigation_drawer"
app:menu="@menu/drawer_menu"
android:layout_gravity="start"/>
</androidx.drawerlayout.widget.DrawerLayout>
|
LinearLayoutの中にToolbarを入れました。
ようやくKotlinでコーディングです。
ということでMainActivity.ktを開いてください。
1
2
3
4
5
6
7
8
9
10
11
12
13
14
15
16
17
18
19
| class MainActivity : AppCompatActivity() {
override fun onCreate(savedInstanceState: Bundle?) {
super.onCreate(savedInstanceState)
setContentView(R.layout.activity_main)
//Toolbarを登録
setSupportActionBar(toolbar)
//ハンバーガーメニューのアイコンを実装
//第4、5引数はアクセシビリティで使うみたい。
val actionBarDrawerToggle = ActionBarDrawerToggle(
this, drawer_layout, toolbar, R.string.app_name, R.string.app_name
)
drawer_layout.addDrawerListener(actionBarDrawerToggle)
actionBarDrawerToggle.syncState()
}
}
|
ActionBarDrawerToggle()の第4、5引数はアクセシビリティで使うみたいです(ドキュメントによると)。
今回は適当に入れました。
出来たら実行してみてください。
ハンバーガーメニュー押しても開くし、端っこから左へスワイプでも開く+だんだんアイコンが変化してくると思います。
Screenshot_20191107-224549.png
ヘッダーを付ける
ヘッダーを付けるとメニューの上に何かViewを置くことができます。
今回は適当に画像でも置いてみましょう。
Screenshot_20191107-225843.png
ヘッダーのレイアウト作成
layoutフォルダにdrawer_header_layout.xmlでレイアウトファイルを作成してください。
画像はプロジェクトに入ってたものを使うことに。
1
2
3
4
5
6
7
8
9
10
11
12
13
14
15
16
17
18
19
20
21
| <?xml version="1.0" encoding="utf-8"?>
<LinearLayout xmlns:android="http://schemas.android.com/apk/res/android"
xmlns:app="http://schemas.android.com/apk/res-auto"
android:layout_margin="10sp"
android:layout_width="match_parent"
android:layout_height="wrap_content">
<ImageView
android:id="@+id/imageView"
android:layout_width="wrap_content"
android:layout_height="wrap_content"
app:srcCompat="@mipmap/ic_launcher_round" />
<TextView
android:id="@+id/textView"
android:layout_width="wrap_content"
android:layout_height="wrap_content"
android:layout_gravity="center_vertical"
android:layout_weight="1"
android:text="ナビゲーションドロワーの練習です" />
</LinearLayout>
|
ナビゲーションドロワーにヘッダーを入れる
activity_main.xmlを開いて、NavigationViewにapp:headerLayoutの属性?を付けます。
1
2
3
4
5
6
7
8
9
10
11
12
13
14
15
16
17
18
19
20
21
22
23
24
25
26
27
28
29
30
31
32
| <?xml version="1.0" encoding="utf-8"?>
<androidx.drawerlayout.widget.DrawerLayout xmlns:android="http://schemas.android.com/apk/res/android"
xmlns:app="http://schemas.android.com/apk/res-auto"
xmlns:tools="http://schemas.android.com/tools"
android:id="@+id/drawer_layout"
android:layout_width="match_parent"
android:layout_height="match_parent"
tools:context=".MainActivity">
<LinearLayout
android:layout_width="match_parent"
android:layout_height="match_parent"
android:orientation="vertical">
<androidx.appcompat.widget.Toolbar
android:id="@+id/toolbar"
android:layout_width="match_parent"
android:layout_height="wrap_content"
android:background="?attr/colorPrimary"
android:minHeight="?attr/actionBarSize"
android:theme="?attr/actionBarTheme" />
</LinearLayout>
<com.google.android.material.navigation.NavigationView
android:layout_width="wrap_content"
android:layout_height="match_parent"
android:id="@+id/navigation_drawer"
app:menu="@menu/drawer_menu"
app:headerLayout="@layout/drawer_header_layout"
android:layout_gravity="start"/>
</androidx.drawerlayout.widget.DrawerLayout>
|
出来たら実行してみてください。
メニューの上に画像が出てくると思います。
Screenshot_20191107-225843.png
ヘッダーをステータスバーの下まで潜れないの?
できますよ~
Screenshot_20191107-230521.png
activity_main.xmlを開いてください。
変更点はDrawerLayoutにfitsSystemWindows属性がついた点ですね。 android:fitsSystemWindows=”true”を書き足すことでステータスバーの下へ侵略できます。
1
2
3
4
5
6
7
8
9
10
11
12
13
14
15
16
17
18
19
20
21
22
23
24
25
26
27
28
29
30
31
32
33
| <?xml version="1.0" encoding="utf-8"?>
<androidx.drawerlayout.widget.DrawerLayout xmlns:android="http://schemas.android.com/apk/res/android"
xmlns:app="http://schemas.android.com/apk/res-auto"
xmlns:tools="http://schemas.android.com/tools"
android:id="@+id/drawer_layout"
android:fitsSystemWindows="true"
android:layout_width="match_parent"
android:layout_height="match_parent"
tools:context=".MainActivity">
<LinearLayout
android:layout_width="match_parent"
android:layout_height="match_parent"
android:orientation="vertical">
<androidx.appcompat.widget.Toolbar
android:id="@+id/toolbar"
android:layout_width="match_parent"
android:layout_height="wrap_content"
android:background="?attr/colorPrimary"
android:minHeight="?attr/actionBarSize"
android:theme="?attr/actionBarTheme" />
</LinearLayout>
<com.google.android.material.navigation.NavigationView
android:layout_width="wrap_content"
android:layout_height="match_parent"
android:id="@+id/navigation_drawer"
app:menu="@menu/drawer_menu"
app:headerLayout="@layout/drawer_header_layout"
android:layout_gravity="start"/>
</androidx.drawerlayout.widget.DrawerLayout>
|
しかしこのままだとステータスバーの色のせいで見えなくなるのでステータスバーの色を透明にする必要があります。
styles.xmlを開いてドロワー用レイアウトへ属性を追加します。
何を追加するのかって話ですがandroid:statusBarColorを追加します。値は@android:color/transparent(透明)です。
1
2
3
4
5
6
7
8
9
10
11
| <!-- ドロワー用レイアウト -->
<style name="DrawerTheme" parent="Theme.AppCompat.Light.DarkActionBar">
<item name="windowActionBar">false</item>
<item name="windowNoTitle">true</item>
<item name="android:statusBarColor">@android:color/transparent</item>
<item name="colorPrimary">@color/colorPrimary</item>
<item name="colorPrimaryDark">@color/colorPrimaryDark</item>
<item name="colorAccent">@color/colorAccent</item>
</style>
|
これで起動すればステータスバーの色が透明になって見れるようになります。
Screenshot_20191107-230521.png
メニューを押したときに何かしたい
こんな感じに
1
2
3
4
5
6
7
8
9
10
11
12
13
14
15
16
17
18
19
20
21
22
23
24
25
26
27
28
29
30
31
32
33
34
35
36
37
38
39
| class MainActivity : AppCompatActivity() {
override fun onCreate(savedInstanceState: Bundle?) {
super.onCreate(savedInstanceState)
setContentView(R.layout.activity_main)
//Toolbarを登録
setSupportActionBar(toolbar)
//ハンバーガーメニューのアイコンを実装
//第4、5引数はアクセシビリティで使うみたい。
val actionBarDrawerToggle = ActionBarDrawerToggle(
this, drawer_layout, toolbar, R.string.app_name, R.string.app_name
)
drawer_layout.addDrawerListener(actionBarDrawerToggle)
actionBarDrawerToggle.syncState()
//メニューを押したとき
navigation_drawer.setNavigationItemSelectedListener {
when(it.itemId){
R.id.drawer_menu_java->{
//java押したとき
Snackbar.make(navigation_drawer,"30億のデバイスで走るJava",Snackbar.LENGTH_SHORT).show()
}
R.id.drawer_menu_kotlin->{
//kotlin押したとき
Snackbar.make(navigation_drawer,"apply{}便利すぎる",Snackbar.LENGTH_SHORT).show()
}
R.id.drawer_menu_js->{
//JS押したとき
Snackbar.make(navigation_drawer,"undefined",Snackbar.LENGTH_SHORT).show()
}
}
//押したらナビゲーションドロワーを閉じる
drawer_layout.closeDrawer(navigation_drawer)
true
}
}
}
|
Javaを押したときSnackbarがでて「30億のデバイスで走るJava」と表示されれば成功です。おめでとう!
終わりに
ナビゲーションドロワーのレイアウトを少し変えればばボタンとかおけます。
複雑になりそうだけど。
1
2
3
4
5
6
7
8
9
10
11
12
13
14
15
16
17
18
19
20
21
22
23
24
25
26
27
28
29
30
31
32
33
34
35
36
37
38
39
40
41
42
43
44
45
46
47
48
49
50
51
52
| <?xml version="1.0" encoding="utf-8"?>
<androidx.drawerlayout.widget.DrawerLayout xmlns:android="http://schemas.android.com/apk/res/android"
xmlns:app="http://schemas.android.com/apk/res-auto"
xmlns:tools="http://schemas.android.com/tools"
android:id="@+id/drawer_layout"
android:fitsSystemWindows="true"
android:layout_width="match_parent"
android:layout_height="match_parent"
tools:context=".MainActivity">
<LinearLayout
android:layout_width="match_parent"
android:layout_height="match_parent"
android:orientation="vertical">
<androidx.appcompat.widget.Toolbar
android:id="@+id/toolbar"
android:layout_width="match_parent"
android:layout_height="wrap_content"
android:background="?attr/colorPrimary"
android:minHeight="?attr/actionBarSize"
android:theme="?attr/actionBarTheme" />
</LinearLayout>
<com.google.android.material.navigation.NavigationView
android:layout_width="wrap_content"
android:layout_height="match_parent"
android:id="@+id/navigation_drawer"
android:layout_gravity="start">
<LinearLayout
android:layout_width="match_parent"
android:layout_height="match_parent"
android:orientation="vertical">
<ImageView
android:id="@+id/imageView2"
android:layout_width="match_parent"
android:layout_height="wrap_content"
app:srcCompat="@mipmap/ic_launcher_round" />
<Button
android:layout_gravity="center_vertical"
android:id="@+id/button"
android:layout_width="match_parent"
android:layout_height="wrap_content"
android:text="ボタンとかおけます。" />
</LinearLayout>
</com.google.android.material.navigation.NavigationView>
</androidx.drawerlayout.widget.DrawerLayout>
|
Screenshot_20191107-233906.png
それからstyles.xmlのparentをTheme.MaterialComponents.Light.DarkActionBarにするとメニュー選択時が少し変わります。
Screenshot_20191107-234614.png
おつ!888888888888888。